Photographing the Orion Nebula as a beginner (Sony a6700, untracked)
Hey guys! I recently drove a couple hours to a dark sky location to have my first legit attempt at some DSO (deep-sky object) astrophotography. This trip was completely spontaneous, but I knew I had to do it considering the ideal conditions (clear skies and a new moon).
I've written out my entire process below! I know there's a lot I need to improve on, so feel free to drop in any advice you have.
1. Setup
I used my Sony a6700 with a tripod and a 17-70mm lens (all parts are linked at the end). I would've loved to have a slightly higher focal length for better zoom, but we gotta work with what we have!
But as far as essentials go, a stable tripod seems to be absolutely critical for astrophotography. The tiniest of vibrations can mess up your shots. My tripod is amazing for the price, but I do wonder if something heavier would've been better.
Also, you need some way of taking hundreds of shots in an efficient manner. Taking lots of shots allows you to stack them later to bring out as much detail as possible. I lucked out here because my a6700 has a built-in intervalometer for this exact purpose. But if your camera doesn't have that option, you will likely need to buy a physical intervalometer.
At the very least, make sure to set a short delay on your exposures. This gives you time to move your hands away from the camera after hitting the shutter button. Otherwise, you will likely shake the camera a little during your exposures and ruin the image quality.
Once you've got those two things figured out, beginner astrophotography setups can be surprisingly simple and budget-friendly! As long as you have a decent camera and lens, you should be good to go. You can probably get some awesome results in a setup that costs less than $800.
2. Taking the raw photos
When I arrived on site, I took a quick glance through my settings. I made sure I was in manual focus and taking the largest RAW images available. I also lowered my aperture to f/2.8 to take in the most light possible.
Next, I zoomed my lens up to 70mm and began adjusting the focus ring on my camera. The goal here is to focus in on some stars and make them as small as you can. Unfocused stars are big and blurry, so the tinier the better!
Once you've focused for the first time, finding targets becomes a lot easier. You can actually zoom in and out as needed after that since focus will mostly be retained (assuming you’re using a constant aperture lens). Unlike with nearby objects of varying distance requiring you to constantly refocus, the entire night sky is effectively at one distance: "infinite".
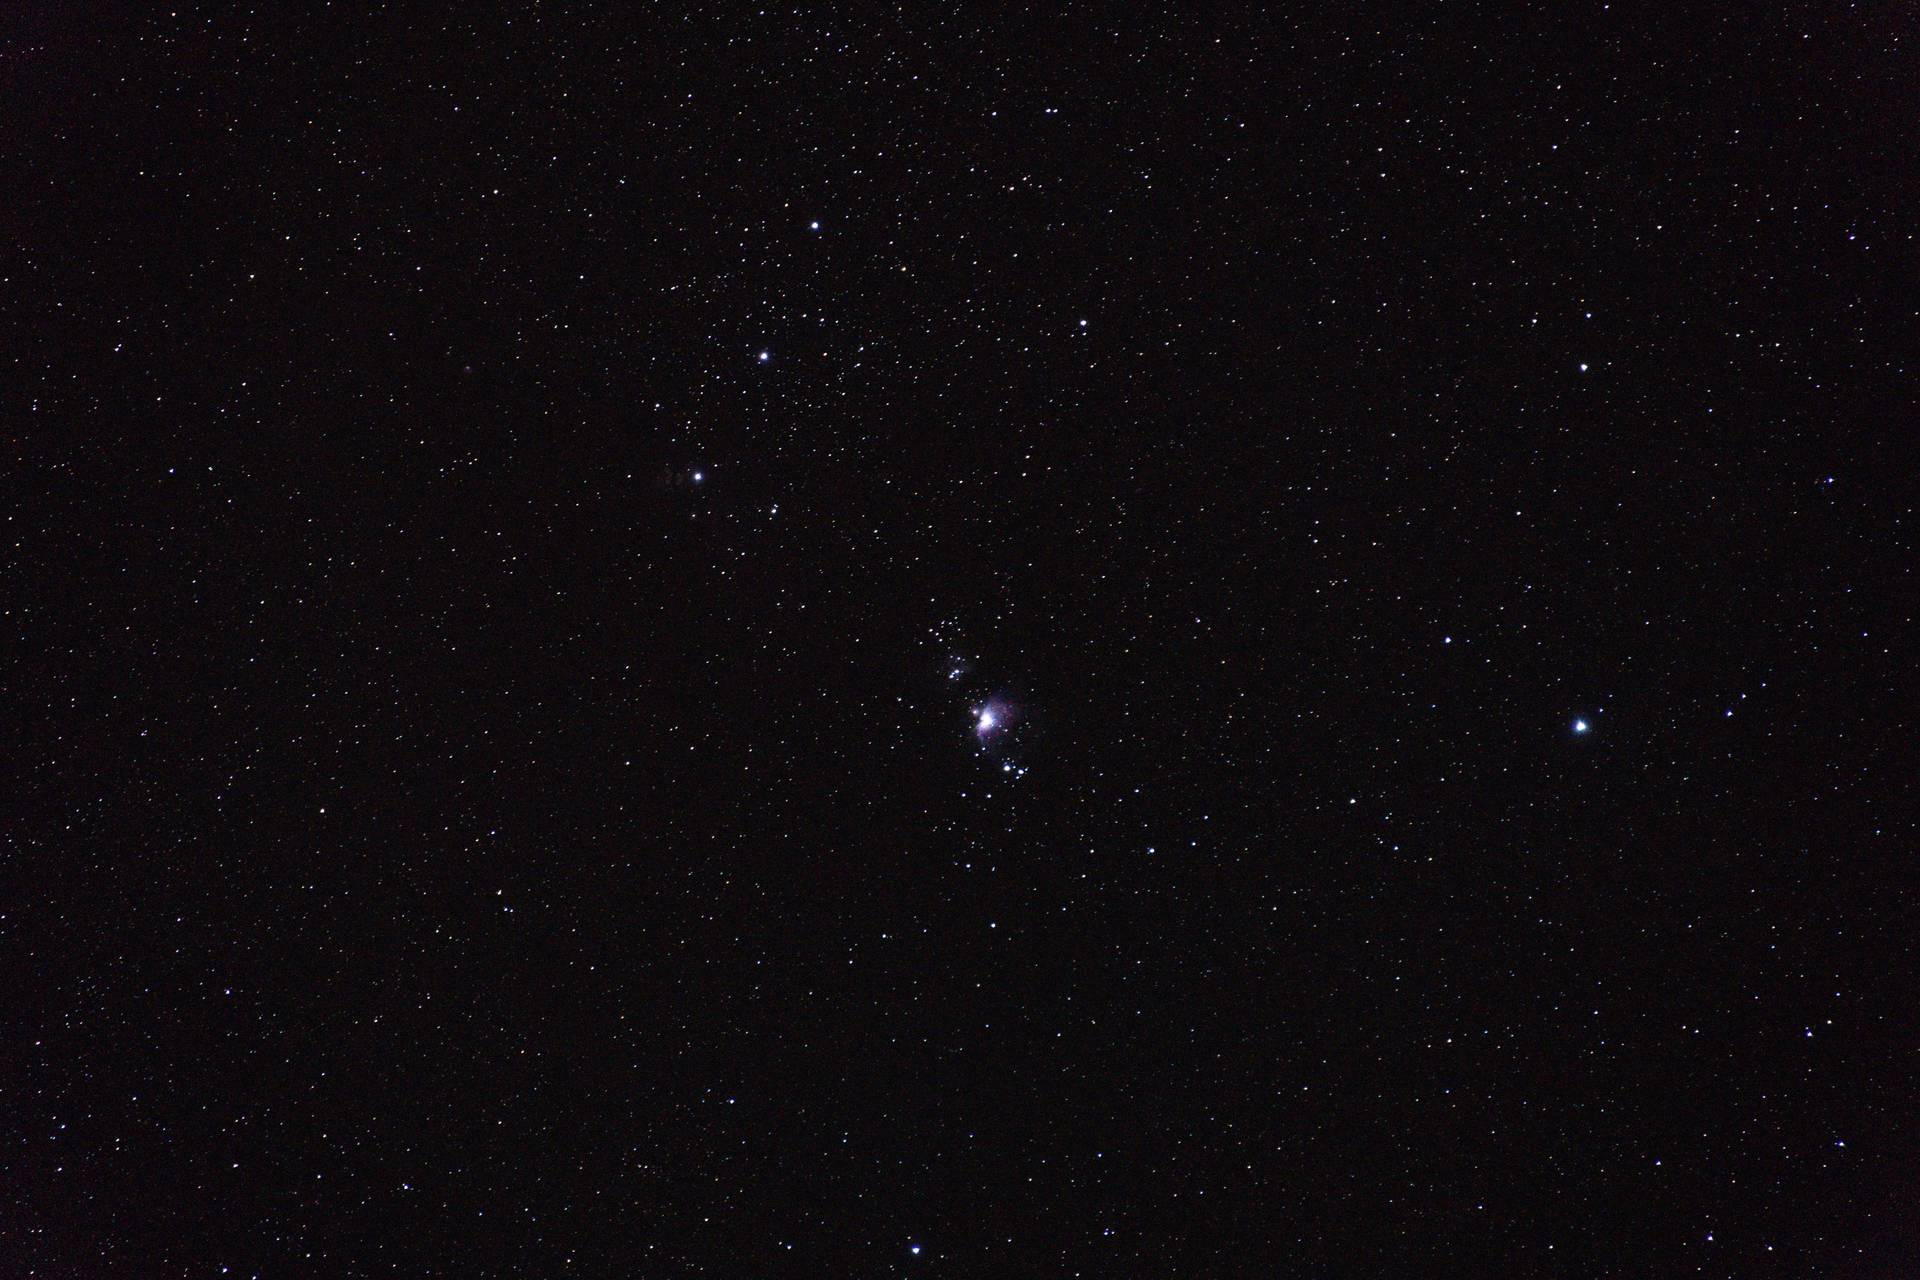
I was quickly able to locate the Orion Nebula using this method and a night sky app on my phone. Making sure I was back at 70mm, I prepared to make my final adjustments.
The two things left to adjust were shutter speed and ISO. I used the "rule of 400" to calculate my shutter speed to avoid star trails. In my case, it was 400 / (1.5 crop factor x 70mm focal length) = ~3.8 seconds. I rounded up to 4s, but rounding down may be preferable for better quality.
ISO probably requires the most experimentation. I settled on 6400, but apparently a good rule of thumb is to start at 800 and work your way up. I do wonder if I should've chosen something different. Higher ISOs (up to a certain point) result in images where you can see more, but they also introduce more graininess.
After a little testing, it was time to start taking the photos! I set my built-in intervalometer to take 150 shots. With 4s exposures and a 1s delay between each (which I'm not sure was necessary), it took about 12 minutes. Ideally, you should do a lot more than 150 shots though. People often recommend at least 300. The more images, the more quality you can bring out.
3. Taking calibration frames
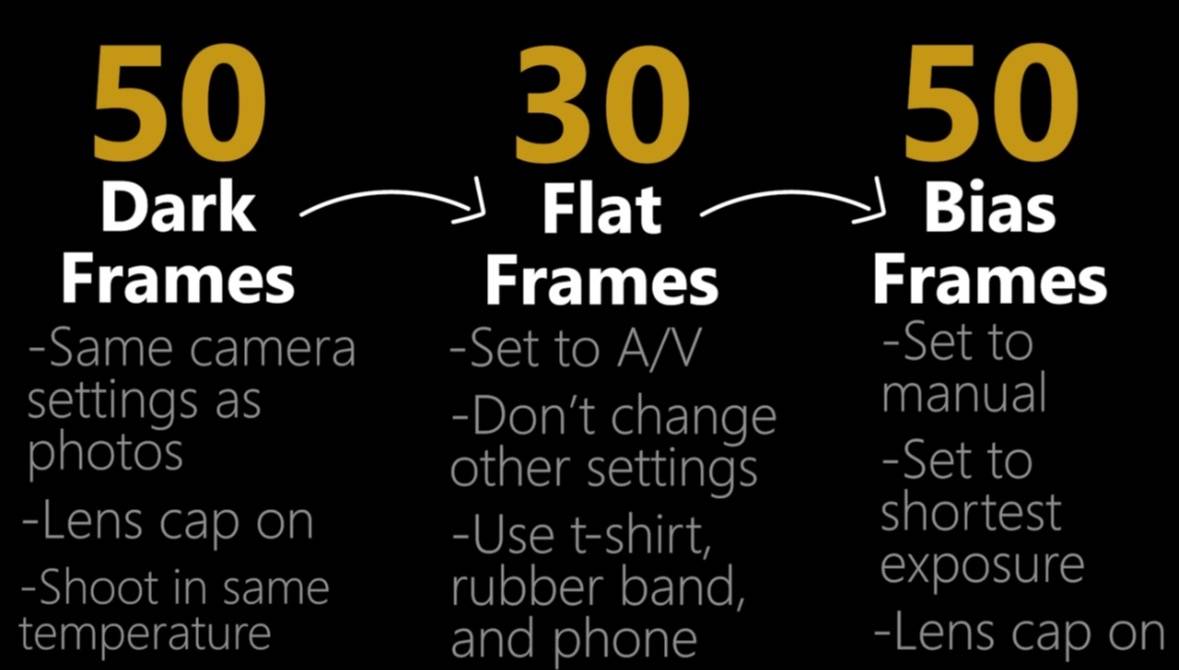
I think my greatest mistake during this session was not getting calibration frames (shots). These are always done on-site immediately after shooting, since camera temperature needs to be preserved from your primary shots. Ultimately, calibration frames reduce noise and can greatly improve the quality of your final image.
The guides I've linked at the end of this post best explain how to take these, but above is a quick graphic that I will use for future reference (courtesy of The Heavens Declare).
4. Stacking the photos

When I finally arrived home, I plugged my 150 RAW shots into DeepSkyStacker following the video guides. The idea behind this step is simple: stacking tons of images averages out the noise, while the thing that we want to photograph (called the "signal") gains more and more information. In my case, the Orion Nebula was the signal.
The result was an image much darker than any of my single shots, which apparently is to be expected. It's really cool how these stacked images hide so much detail! Which brings us to the final step...
5. Post-processing
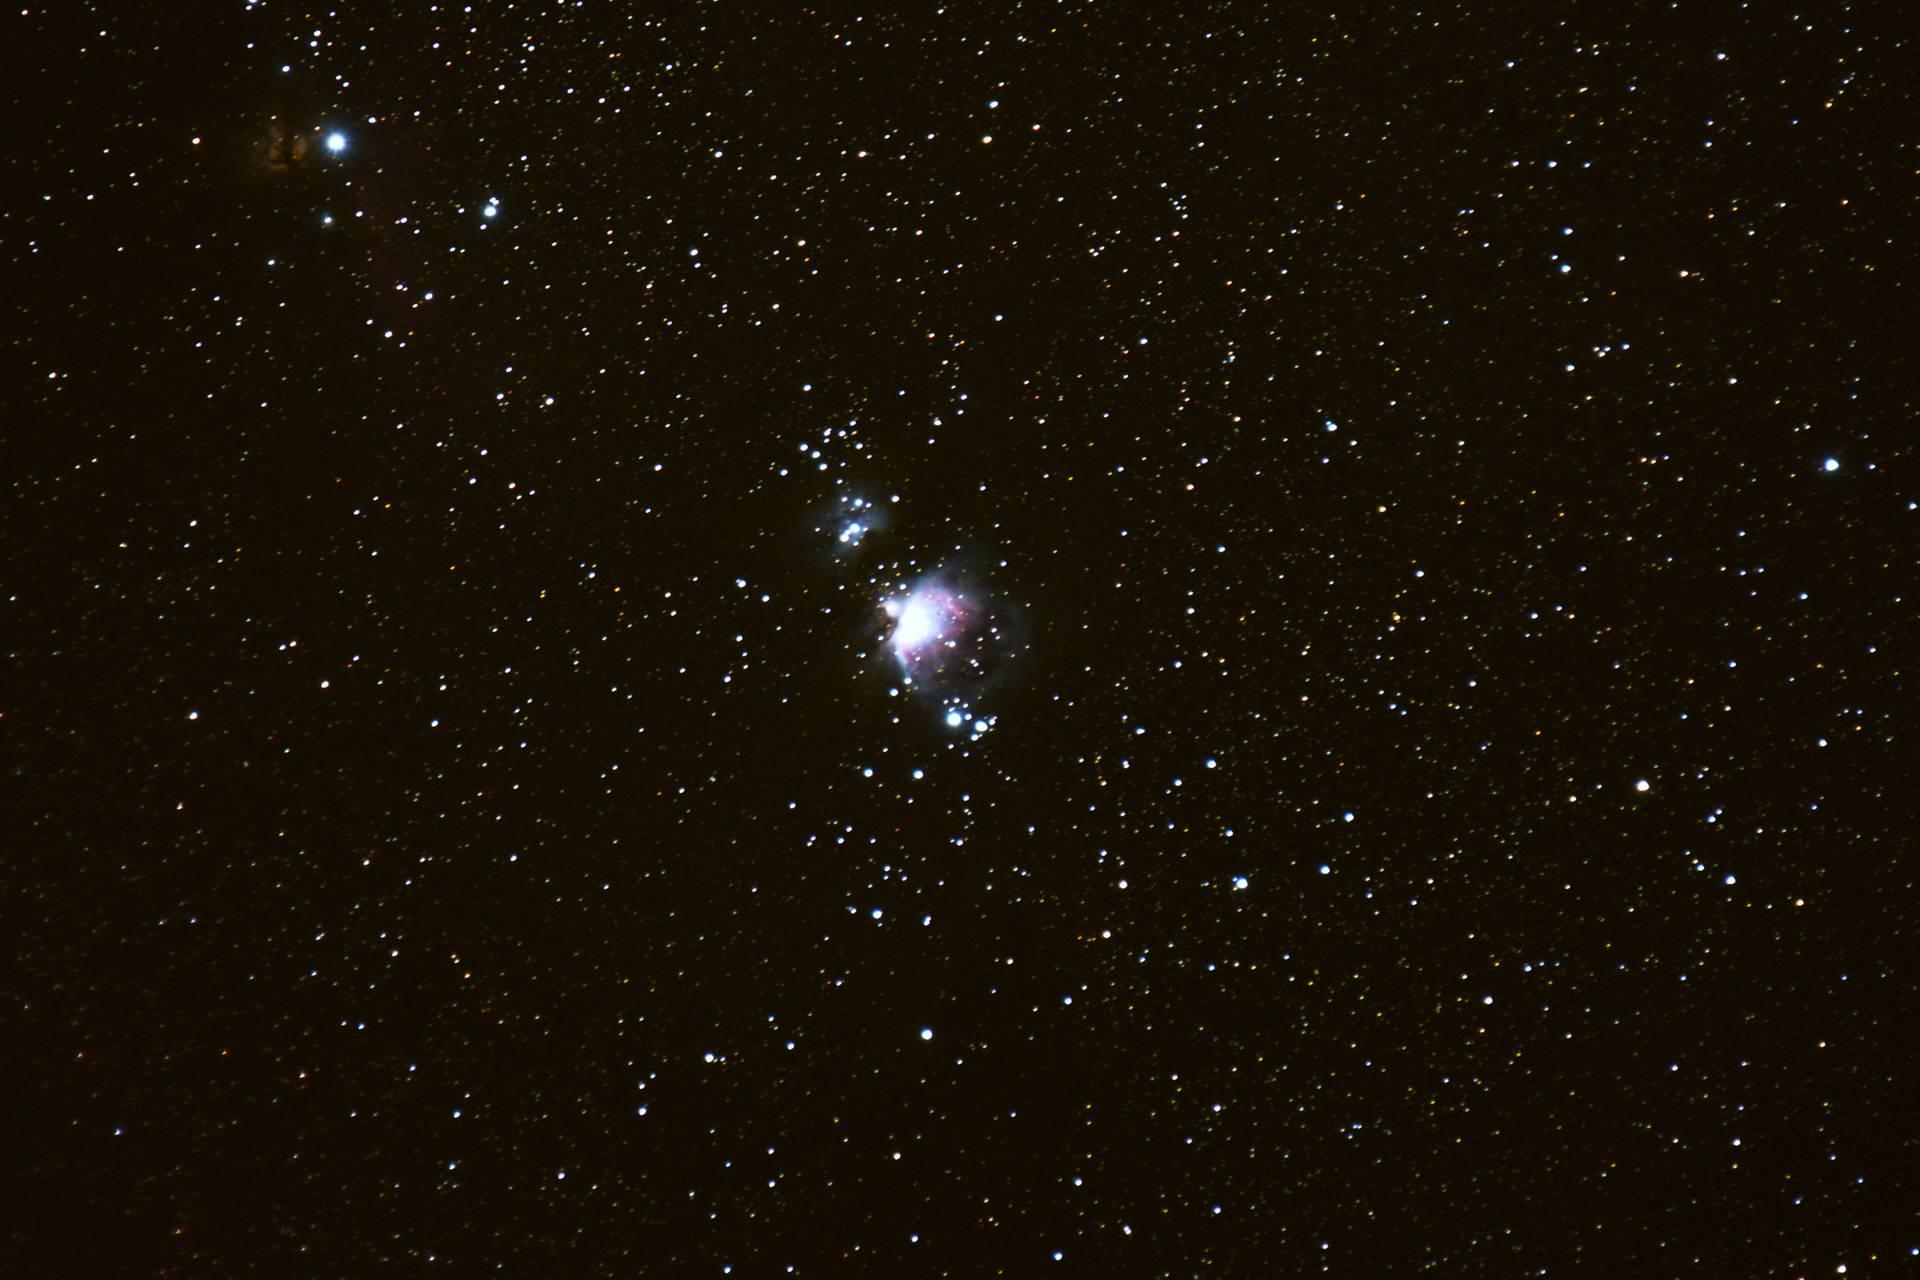
Finally, I took my stacked image and opened it in GIMP to bring out the detail. This software is a completely free alternative to Photoshop.
This took me hours of experimentation, but what I settled on was a process of adjusting the "curves" first, then the "levels", and then back and forth a couple more times. Then, I adjusted the image saturation and temperature to my taste.
Overall, I think it turned out pretty decent for a first attempt! There's less detail than I'd prefer and the background is a bit yellow-tinted, but it's a great start! More importantly, I learned a lot and I think I may have permanently hooked myself on astrophotography.
Thanks for reading!
My camera setup:
Light pollution map:
The guides I followed:
Full process for Orion Nebula:
Another example (Andromeda Galaxy):
Processing with GIMP: